KOREAN HOME COOKING
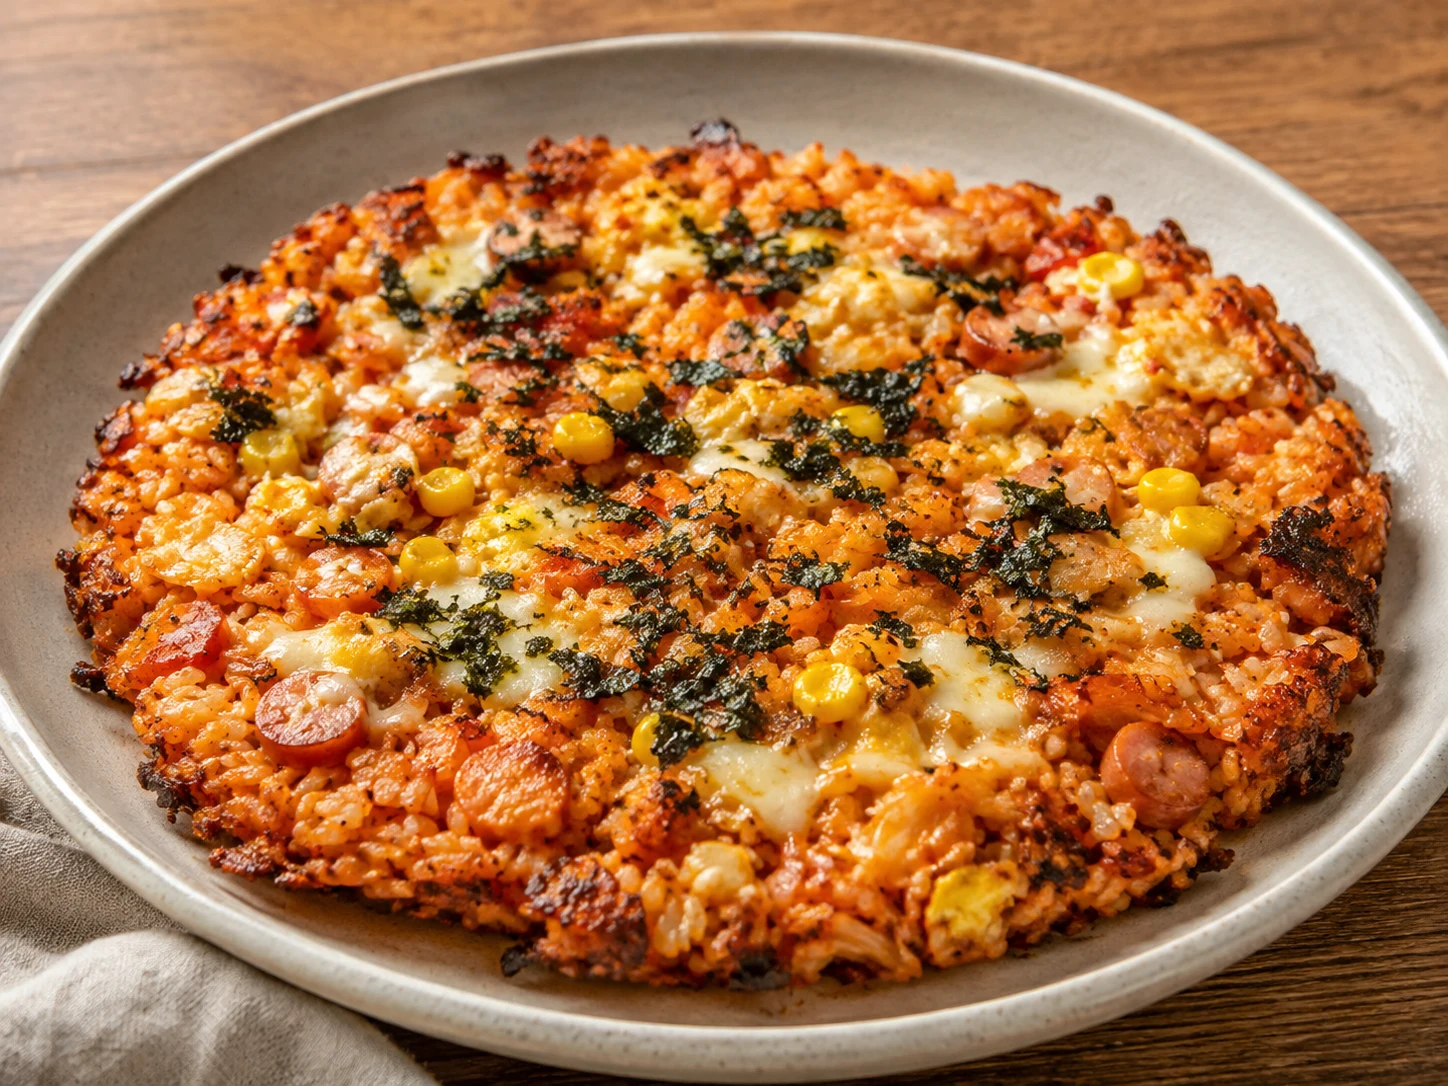
Air-Fryer Nurungji Kimchi Fried Rice (누룽지 김치볶음밥)
누룽지 김치볶음밥 · Nurungji Kimchi Bokkeumbap
Tangy kimchi rice, sausage, corn, egg, and mozzarella turn crisp at the edges in the air fryer—no stovetop frying required.
Editorial guidance updated September 16, 2026 · Not a claim of kitchen testing
QUICK ANSWER
What to know before you cook
Tangy kimchi rice, sausage, corn, egg, and mozzarella turn crisp at the edges in the air fryer—no stovetop frying required.
Air-Fryer Nurungji Kimchi Fried Rice (누룽지 김치볶음밥) takes about 30 minutes and makes 2 servings. It is rated easy and the finished dish is mild to medium, depending on the kimchi. Use 1 teaspoon gochugaru or omit it for less heat; add sliced Cheongyang chile before cooking for a hotter version.
The key cooking cue: Small, even pieces expose more rice to the hot air and keep large wet pockets of kimchi from softening the crust.
WHY THIS DISH MATTERS
A little cultural context
Kimchi bokkeumbap is an everyday Korean favorite that turns sour kimchi and cooked rice into a satisfying meal. Nurungji traditionally means the toasted rice crust formed at the bottom of a pot; this modern air-fryer version aims for that crackly edge with circulating heat rather than stovetop frying.
INGREDIENTS
What you'll need
Both systems are shown so you can cook without converting.
COOKING WEBTOON
Cook it panel by panel
A quick visual memory guide for the whole recipe.
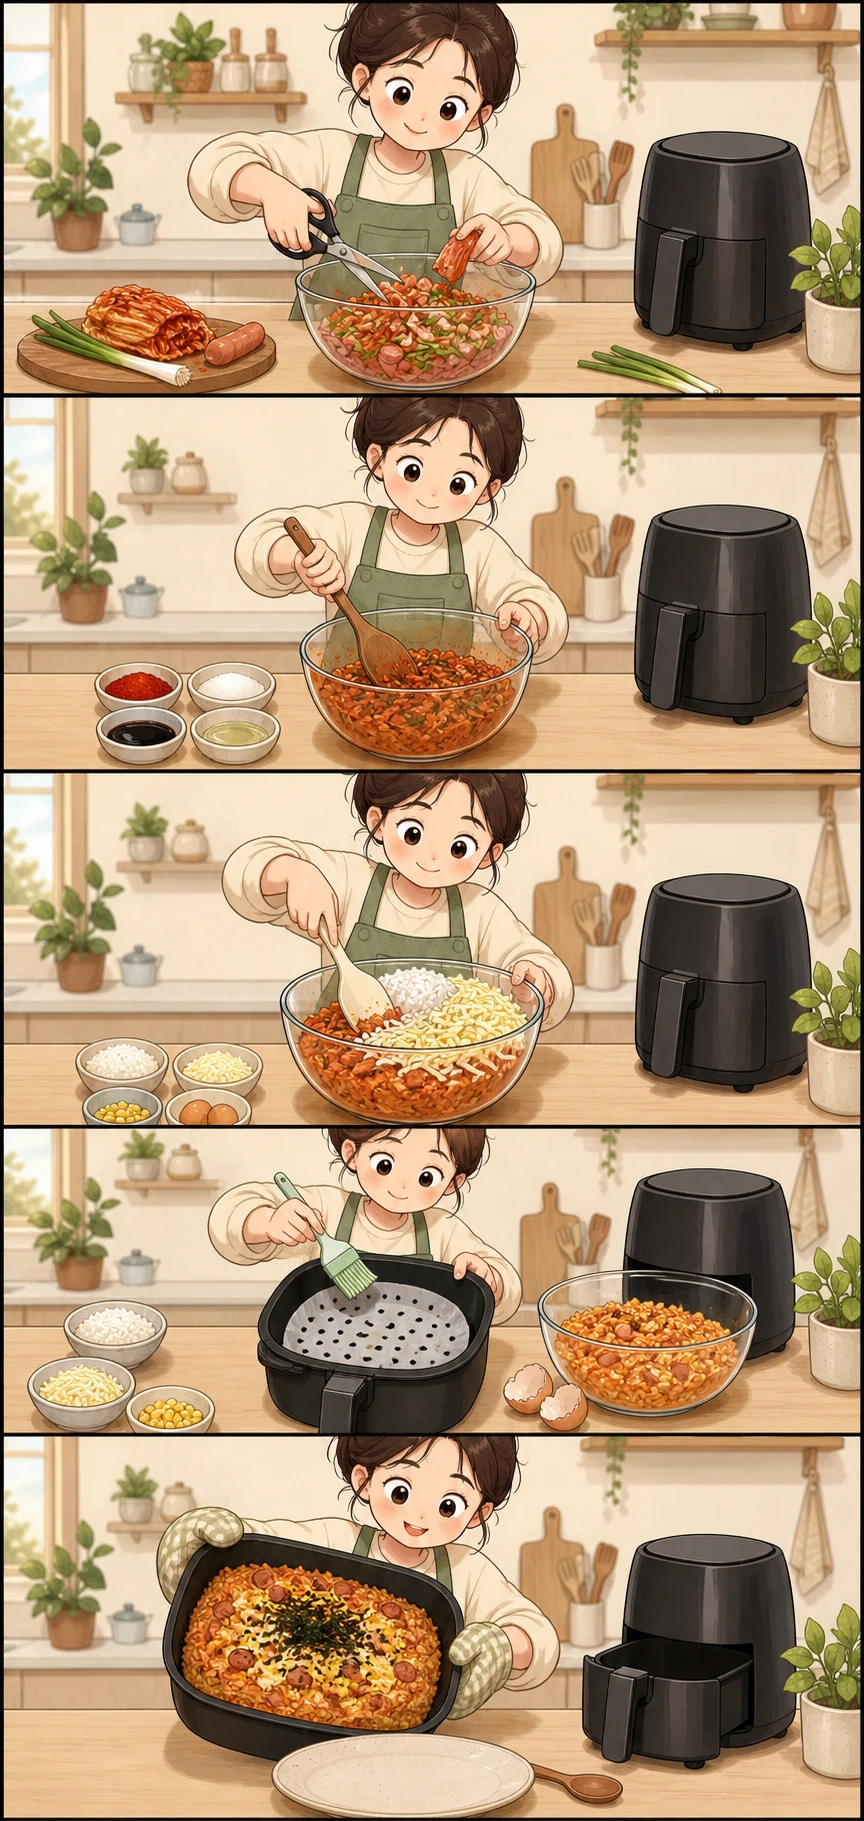 1
1Snip the mix-ins
5 minFinely cut the kimchi, scallion, and sausage together in a large bowl so every spoonful will brown evenly.
- 2
Season the kimchi
2 minStir in fine gochugaru, sugar, soy sauce, and oil until the kimchi looks evenly glossy.
- 3
Fold in rice
3 minGently fold in the rice, mozzarella, and corn. Separate clumps without mashing the grains or cheese.
- 4
Build the rice layer
4 minOil fitted parchment, spread the rice loosely, then add the eggs and break the yolks across the surface.
- 5
Air-fry and finish
12 min + 2 min restCook at 356°F/180°C until the egg is set and edge grains are crisp. Rest briefly, then finish with gim.
AI-assisted illustration. Follow the written recipe below for exact measurements, air-fryer safety, egg doneness, and rice handling.
DIRECTIONS
How to make it
- 01
Snip the mix-ins · 5 minutes
Put the kimchi in a large bowl and use clean kitchen scissors to cut it into pieces no larger than 1/2 inch/1 cm. Snip in the scallion and sausage, then continue cutting until the pieces are small and evenly distributed.
- 02
Season the kimchi · 2 minutes
Add the fine gochugaru, sugar, soy sauce, and 1 tablespoon/15 ml oil. Stir until the sugar is dispersed and every piece looks evenly glossy; there should be no dry red-powder pockets.
- 03
Fold in the rice, cheese, and corn · 3 minutes
Add the cooked rice and separate any firm clumps with the scissors or a silicone spatula. Fold in the mozzarella and drained corn gently just until combined, stopping before the cheese is mashed into the rice.
- 04
Build the loose rice layer · 4 minutes
Fit heat-safe parchment inside a cold air-fryer basket and brush it with the remaining 1 teaspoon/5 ml oil. Add the rice immediately so it weighs down the paper, then spread it into a loose layer about 1/2 inch/1.25 cm thick without packing it. Crack the eggs over the top and pierce and spread the yolks with a fork.
- 05
Air-fry, rest, and finish · 12 minutes plus 2 minutes
Air-fry at 356°F/180°C for 12 minutes without flipping. Start checking at 10 minutes: the surface should look dry, the egg should have no glossy liquid, the cheese should be melted, and the edge grains should be golden and crisp while the center is steaming hot. If the egg is still wet or the rice is pale, cook 2 to 3 minutes longer. Rest in the basket for 2 minutes, transfer to a plate, and scatter over the gim.
COOK WITH CONFIDENCE
Fix common problems
Use the symptom, likely cause, and rescue step while you cook.
Rice stays soft instead of crisp
Likely causeThe layer is too thick or the kimchi carries extra liquid.
How to fix itDrain the kimchi and spread cooked rice thinly. Check the base before extending air-fryer time; adding water as for raw pot rice works against crisping.
Top darkens before the center is hot
Likely causeThe basket is crowded or the layer uneven.
How to fix itUse a shallower layer and reduce heat if needed. Check the center reaches 165°F/74°C, especially with refrigerated rice and meat. Keep parchment weighed down with food.
SHOP & SUBSTITUTE
Cook it anywhere
Ingredient swaps
Well-fermented kimchiChoose a sour, fully fermented napa kimchi. If yours is very fresh, add 1 teaspoon rice vinegar; for vegetarian cooking, check that it contains no fish sauce or salted shrimp.
Korean short-grain riceUse Calrose or Japanese short-grain rice. Medium-grain rice also works, but avoid fluffy basmati or very wet fresh rice.
Frankfurter-style sausageUse diced smoked tofu, cooked mushrooms, or a plant-based sausage in the same volume.
Low-moisture mozzarellaUse mild provolone or Monterey Jack. For dairy-free cooking, omit it or use a meltable plant-based cheese.
Fine gochugaruUse 1 to 2 teaspoons Korean coarse gochugaru. Do not substitute cayenne in equal volume; it is much hotter.
Korean pantry guide
Fully fermented kimchi tastes pleasantly sour and gives fried rice deeper flavor than a newly made batch.
Search: Korean aged napa kimchi sin kimchiFinely ground Korean red pepper flakes disperse smoothly through the seasoning; their heat is usually rounder than cayenne.
Search: Korean fine red pepper powder goun gochugaruCrushed roasted seaweed adds a savory, briny finish. Seasoned seaweed snack sheets can be crumbled in a pinch.
Search: Korean roasted seaweed flakes gim garuA dark, all-purpose Korean soy sauce commonly used for stir-fries and marinades.
Search: Korean jin soy sauce jin ganjangServe it with
- Oi-muchim cucumber salad
- Crunchy danmuji pickled radish
- A light miyeok-guk seaweed soup
Spice level
Mild to medium, depending on the kimchi. Use 1 teaspoon gochugaru or omit it for less heat; add sliced Cheongyang chile before cooking for a hotter version.
Storage & serving
Cool leftovers promptly and refrigerate in a shallow airtight container within 2 hours for up to 3 days. Reheat once at 375°F/190°C in the air fryer for 6 to 8 minutes, until the center reaches 165°F/74°C; add gim after reheating for the best texture.
REAL COOK QUESTIONS
Good questions, clear answers
Short answers for substitutions, heat level, make-ahead cooking, and serving.
What can I substitute for Well-fermented kimchi in Air-Fryer Nurungji Kimchi Fried Rice (누룽지 김치볶음밥)?
Choose a sour, fully fermented napa kimchi. If yours is very fresh, add 1 teaspoon rice vinegar; for vegetarian cooking, check that it contains no fish sauce or salted shrimp.
Is Air-Fryer Nurungji Kimchi Fried Rice (누룽지 김치볶음밥) spicy?
Mild to medium, depending on the kimchi. Use 1 teaspoon gochugaru or omit it for less heat; add sliced Cheongyang chile before cooking for a hotter version.
Can I make Air-Fryer Nurungji Kimchi Fried Rice (누룽지 김치볶음밥) ahead of time?
Cool leftovers promptly and refrigerate in a shallow airtight container within 2 hours for up to 3 days. Reheat once at 375°F/190°C in the air fryer for 6 to 8 minutes, until the center reaches 165°F/74°C; add gim after reheating for the best texture.
What should I serve with Air-Fryer Nurungji Kimchi Fried Rice (누룽지 김치볶음밥)?
Serve it with Oi-muchim cucumber salad, Crunchy danmuji pickled radish, A light miyeok-guk seaweed soup.
KEEP COOKING
Related Korean recipes
Chosen by shared ingredients, pantry staples, and cooking style.